For additional survey security and monitoring you can use survey access control to set up a list of individual respondent details (instead of an overall survey password). This will:
- Let you create personalised survey links for your respondents (or issue respondents with usernames and passwords, if preferred).
- Allow you to email the survey links to your respondents straight from online surveys.
- Ensure that each respondent can only complete your survey once.
- Give you a record of who has and who hasn’t yet completed your survey so you can send a reminder.
- Pre-populate your survey with information you already have about a respondent.
Note on respondent anonymity
Respondent details can be hidden or permanently discarded before the responses are analysed to keep the data anonymous. To run the survey completely anonymously, without recording any respondent details, simply skip Step 2 below. However, this means you will not be able to email using online surveys, identify who has and who hasn’t completed the survey, or link information back to a respondent in any way.
For more information about maintaining anonymity in your survey, please see our FAQ on respondent anonymity.
Step 1: Create a list of respondents
- On your Dashboard
 , locate your survey and click Distribute.
 - Under
 Survey access control, click on Create a list of respondents.
 - Create your list using either of the two following methods:
- Method 1: Add respondents manually, one at a time.
- Type a username in the Username box (above “Respondent export / import) and click + Add respondent. A random password and token will be automatically generated.
- Add any necessary additional information (e.g. an email address into the Email field and/or pre-populated information into the x1-x10 fields).
- Repeat to add more respondents.
- Method 2: Import a list of respondents in CSV format.
- Please see our Help page on importing your respondent list for more information.
- Method 1: Add respondents manually, one at a time.
- Once you have completed your list, you can click
 Export respondents to save it onto your computer as a CSV file for future reference and distribution. This downloaded CSV file contains all of the respondent information plus a unique link to the survey for each participant.
Note: When using the survey ![]() Preview, you will now need to sign in as one of the respondents on your user list. This will not store any data or “use up” the respondent logins, so you can choose any username and password combination from your list (or add your own to the list and remove it before launch).
Preview, you will now need to sign in as one of the respondents on your user list. This will not store any data or “use up” the respondent logins, so you can choose any username and password combination from your list (or add your own to the list and remove it before launch).
Step 2: Set up a corresponding question field in your survey (optional)
You should skip this step if you want your survey to be completely anonymous.
You need to record identifying information from your respondent list in the survey responses if you wish to:
- email your survey links to your respondents from online surveys;
- track who has and who has not completed your survey; and/or
- attach identifying information to responses so you know which respondent provided which response;
To record the identifying information, you must create a question that captures the username, token or email address of your respondents as follows:
- In the
 Survey builder, click Add item and select Single-line free text question. This can be at any point in your survey; however you may want to place it at the end of your survey to avoid disrupting the question numbering.
 - Type the relevant description into the Question text box (e.g. ‘Username’).
- Click on Advanced options and scroll to the bottom of the question editor.
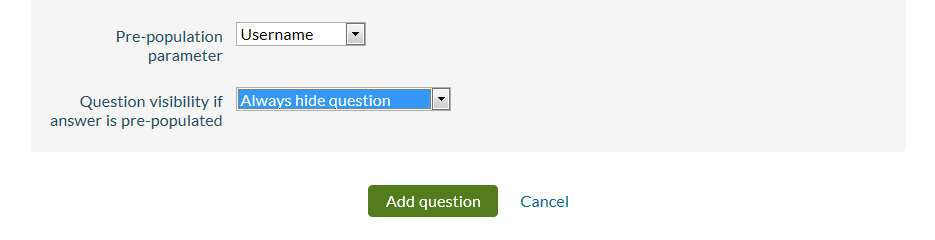
- At Pre-population parameter, select the required parameter (e.g. ‘Username’) from the drop-down list.
- Below, at Question visibility if answer is pre-populated select Always hide question if you want to make the field invisible to respondents.
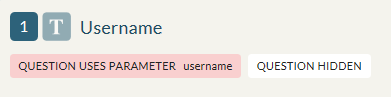
- Click Add question to save. The question will be added to your survey. The pink section below the question text indicates which parameter is used in the question, and the white section indicates the question visibility.
Repeat these steps if you want record other information from your respondent list in the survey responses.
Note: To activate the respondent tracking and email functionality, you only need to record one piece of information (the username, email address or token). You do not have to record all three fields if you do not want to.
Step 3: Distribute your survey
When your survey is ready you can launch it in the usual way. The live survey link will point to a login box asking for a username and password.
To give your respondents access to your survey, you have several options:
- Use online surveys to invite your respondents to participate in your survey.
- Export your list and send a username and password to each respondent.
- Export your list and send the personalised survey link to each respondent.