This page explains how to add an image to your survey. Images can be added to notes, question text and the ‘More info’ section of a question.
If you wish to add a logo to your survey please see Customising your survey’s appearance.
Please ensure that you have obtained copyright clearance to use any files/images that you upload. Any queries from third parties (or arising from our own audits) regarding copyright infringement will be passed on to the institution holding the online surveys account. We reserve the right to temporarily disable a survey and/or user account while any copyright infringement claim is investigated. If it is subsequently discovered that the survey was using content without permission then we will consider this a breach of your online surveys licence and reserve the right to close your account.
Adding an image to your survey is a two-step process.
Step 1: Uploading an image
You cannot add an image directly into the question or note editor. The image must first be uploaded either to online surveys or to a website that is freely accessible (i.e. not located behind an institutional log in, for example).
Images larger than 10Mb cannot be uploaded to online surveys and must be hosted elsewhere.
To upload an image to online surveys:
- Click on Design.
- Click on Survey files.
- The Survey files page lists the allowed file formats. Ensure that your image file is in one of the allowed formats and is below 10Mb in size.
- Click on Browse….
- In the pop-up window, navigate to the folder on your computer which contains the image file you wish to use. Select the image and click Open.
- Click on Save files.
The image will be uploaded to online surveys and the image’s URL will appear in the Survey files page. You can click on the URL to see the image.
If you wish to add more images, repeat steps 3-5 above.
If you wish to delete a file, click on the ![]() Delete tick box for the image you want to delete, and then click on Save files.
Delete tick box for the image you want to delete, and then click on Save files.
Step 2: Adding the image to your survey
- Ensure you have made a note of the URL of your image.
- In the the
 Survey builder, add a new question or note (or click the
  Edit icon next to an existing one).
 - In the question or note text box, click on the
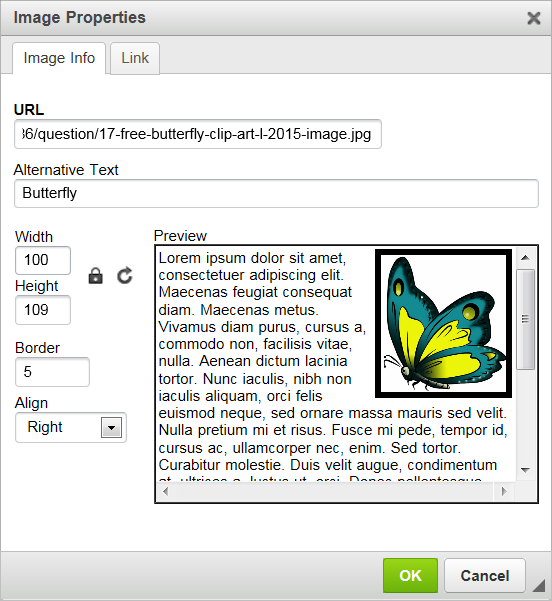
 Image icon. This will open the Image Properties window.
 - Paste the URL of your image into the URL box. Your image will now appear in the Preview box.
- In the Alternative Text box, type in a brief description of your image. This is the text that will be used in case the image itself cannot be accessed, or if a respondent is visually impaired and using a screen reader.
- You can use the Width and Height boxes to change the size of the image in pixels. If the padlock icon is locked, the width and height will be adjusted in proportion to each other. To adjust width and height independently from each other, click on the padlock to unlock it (be aware that this can cause the image to appear stretched and distorted).
- You can add a black frame around your image by entering a pixel width in the Border box. For example, typing in the number “1” will create a 1-pixel wide border, “2” a 2-pixel border, and so on.
- Use the Align drop-down menu to place your image to the left or right of your text.
- If you wish to use your image as a link to another website, click on the Link tab and add the URL of the website you want to link to.
- Click OK.
Once you have clicked OK, your image will appear in your text box. Here you can:
- Click and drag your image to a different place within your text.
- Double-click your image to open the Image Properties window again.
- Delete your image by clicking it to select it, then pressing the Delete button on your keyboard.
- Add further images by repeating steps 2-5 above.